
The Des Moines metro is committed to creating an environment that…
Controlling Cloud Infrastructure with Serverless Compute
You Pay for What You Use, So Use Less
Everything is moving to the cloud. More and more companies are moving both their production and development environments into the cloud to save on hardware costs. By “lifting and shifting” your workloads, you can save on the cost of running those servers in your on-premises datacenter and gain increased reliability from using cloud infrastructure. Lifting and shifting is a great way to get started in the cloud and save on operational costs, but why not take those savings even further?
Let’s say you know that your developers will only use the development environment between 6:00 AM and 6:00 PM, Monday to Friday. That’s only a third of the week, so it should be powered down for those other two thirds to lower your cloud bill. By only having this environment powered on for 12 hours a day, 5 days a week, you can cut your compute bill for these resources by nearly 65% each month. The cloud offers all sorts of tools to help with automation, so let’s take advantage of them and stop your development environment outside of business hours. In AWS we can easily do this with a combination of CloudWatch Events, AWS Lambda, and resource tagging to control what instances are running at any time during the work day.
EC2
We will start with tags. Identify the EC2 instances you want to stop outside of business hours in the AWS console. Click over to the “Tags” tab and select “Add/Edit Tags”. Here we can add custom tags to our resources. I’ve chosen the key names of AutoStart and AutoStop and filled in the values with 6 and 18 (6:00 AM and 6:00 PM). The window for working values will be between 6 and 20 (6:00 AM and 8:00 PM) after following this guide.

Save your tags and head over to IAM in the AWS console.
IAM
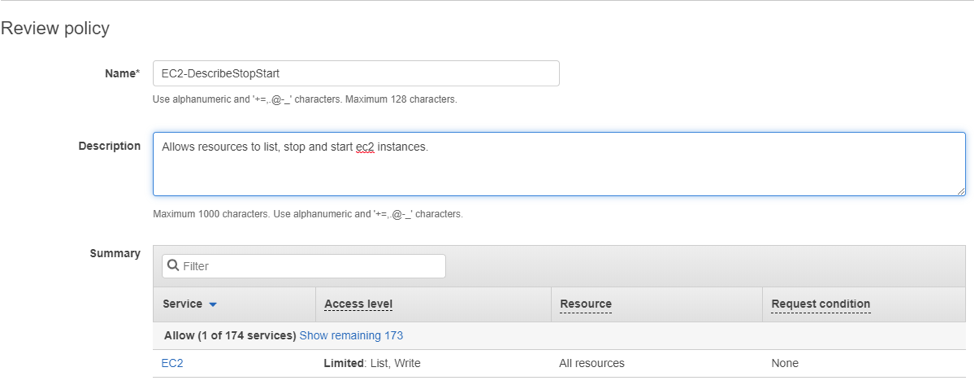
We need to create a role for our functions in order to allow Lambda to interact with our EC2 instances. To do this we will start by creating a policy in the Policies section of IAM.
Lambda will need to be allowed to do three things with our instances, list, stop, and start. Here is the JSON for this policy.
{
"Version": "2012-10-17",
"Statement": [
{
"Effect": "Allow",
"Action": [
"ec2:DescribeInstances",
"ec2:StopInstances",
"ec2:StartInstances"
],
"Resource": "*"
}
]
}
Give the policy a name and description of what it allows a resource to do.
Click “Create policy” and then move to the Roles section of IAM. Click “Create role” and select the Lambda service. On the next screen, search for your policy (EC2-DescribeStopStart) and check the box to select it.
Move on to Tags and then right into Review. Give your role a Name and the click “Create role.”
Now we can move into Lambda.
Lambda
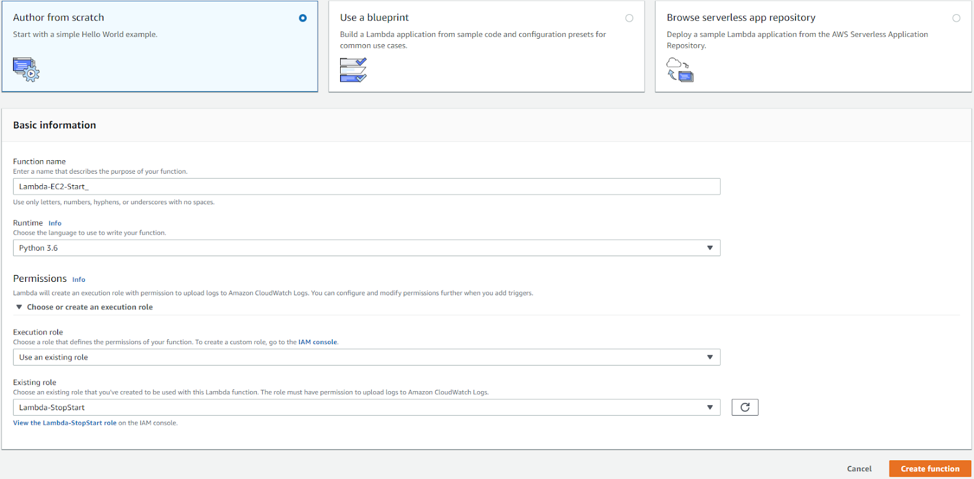
In the Lambda service, we will want to create a new function. Select “Author from scratch,” give it a name, and select the Python 3.6 runtime. Click the arrow to open up the permissions section and select the role you just created in IAM.
We will be making two functions, one to start instances and one to stop instances. They are very similar, but have different scripts.
Click “Create function” to get into the editor. Replace the code in “lambda_funcition” with the following for the start function…
import boto3
import datetime
from datetime import datetime
import logging
import pytz
from pytz import timezone
#setup simple logging for INFO
logger = logging.getLogger()
logger.setLevel(logging.INFO)
#define the connection
ec2 = boto3.resource('ec2')
def lambda_handler(event, context):
#handles DST transitions
local_tz = timezone('US/Central')
local_time = datetime.now(local_tz)
hour = local_time.hour
val = str(hour)
# Use the filter() method of the instances collection to retrieve
# stopped EC2 instances with the current AutoStart tag.
filters = [{
'Name': 'tag:AutoStart',
'Values': [val]
},
{
'Name': 'instance-state-name',
'Values': ['stopped']
}
]
#filter the instances
instances = ec2.instances.filter(Filters=filters)
#locate all running instances
StoppedInstances = [instance.id for instance in instances]
#make sure there are actually instances to start
if len(StoppedInstances) > 0:
#perform the startup
startingUp = ec2.instances.filter(InstanceIds=StoppedInstances).start()
print(startingUp)
else:
print("Nothing to see here")
Be sure to change out the timezone of US/Central with one that is appropriate for you.
This script uses the pytz library to handle time zones and daylight savings changes, but Lambda does not have pytz by default. We will need to add it ourselves.
Make a new folder on your local machine. In a terminal in this folder, run the following command to download pytz…
pip install pytz --target .
This will create two folders, pytz and pytz-xxxx.x.dist-info, with all the files needed to use pytz in Lambda.
Under the “Actions” menu in Lambda, select “Export function” and then “Download deployment package.” Pull the lambda_function.py file out of the zip folder and place it in the same folder as the pytz folders. Zip up the folders and file. Back in Lambda, change the “Code entry type” to “Upload a .zip file,” click the “Upload” button and select the .zip file you just made. Save the Lambda function to have it update. Back in the editor, you can see that two new folders have shown up in the environment.
Repeat this process for the stop function but use the following code instead…
import boto3
import datetime
from datetime import datetime
import logging
import pytz
from pytz import timezone
#setup simple logging for INFO
logger = logging.getLogger()
logger.setLevel(logging.INFO)
#define the connection
ec2 = boto3.resource('ec2')
def lambda_handler(event, context):
#handles DST transitions
local_tz = timezone('US/Central')
local_time = datetime.now(local_tz)
hour = local_time.hour
val = str(hour)
# Use the filter() method of the instances collection to retrieve
# running EC2 instances with the current AutoStop tag.
filters = [{
'Name': 'tag:AutoStop',
'Values': [val]
},
{
'Name': 'instance-state-name',
'Values': ['running']
}
]
#filter the instances
instances = ec2.instances.filter(Filters=filters)
#locate all running instances
RunningInstances = [instance.id for instance in instances]
#make sure there are actually instances to shut down
if len(RunningInstances) > 0:
#perform the shutdown
shuttingDown = ec2.instances.filter(InstanceIds=RunningInstances).stop()
print(shuttingDown)
else:
print("Nothing to see here")
Again, note the time zone. Now that we have our Lambda functions, we need to trigger them. Head over to CloudWatch in the AWS console.
CloudWatch
Under the Events heading, you can find Rules. Everything in AWS defaults to UTC for its time zone. Our business is headquartered in the US Central time zone, which is five or six hours behind UTC depending on daylight savings time. In order to trigger the Lambda functions at the right time in our time zone, the cron expressions need to be created with the right offset in mind.

00 10-23 ? * MON-FRI *

00 0-1 ? * TUE-SAT *
This combination of Cron expressions triggers every hour from 6:00 AM to 9:00 PM CST or 5:00 AM to 8:00 PM CDT, Monday to Friday.
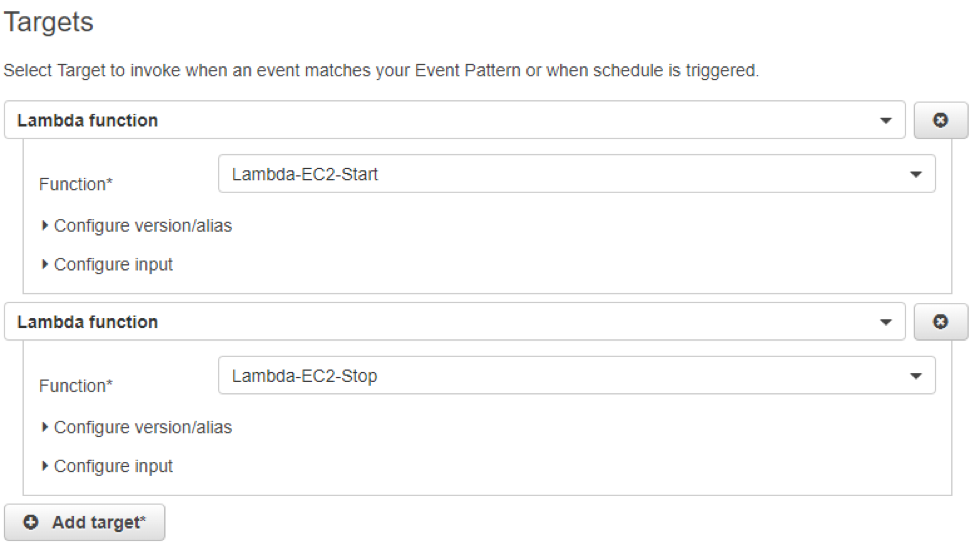
After setting our event source, we will need to target our Lambda functions. Select the start and stop functions created earlier (you can click “Add target*” to get additional functions).
Click “Configure details” to move on and provide a name and description to your rule. Set the state to enabled and click “Create rule.”
Conclusion
Running in the cloud doesn’t have to be expensive. As you start to put more and more of your resources into the cloud, you will want to have a way to corral them and limit wasteful spending. Thanks to Lambda, you have the ability to schedule your EC2 instances. By simply tagging your instances with the right AutoStop and AutoStart values, you can control when your instances are running. They will start up in the morning and shut down at the end of the work day all on their own, which goes a long way toward controlling your cloud costs.
Zirous’ infrastructure team holds a wide range of expertise when it comes to all things cloud: what’s best for your situation, how to get there, and how to customize your environment to fit your schedule. Contact us to talk more.
Related Posts


This Post Has 0 Comments